My DIY adventures have had a more mixed success rate. Some projects were easy and beautiful, like the fabric-covered bulletin board, the little saying I made for our room, and the burlap wreath. Others have been laborious and much harder than anticipated, like the polka-dot wall and the mason jar storage. Future projects include refinishing a free dresser Brian and I acquired, making tissue-paper pom poms to accent a big empty wall in our bedroom, and making a busy board for Mila's first birthday. But I wanted to pass on some of the knowledge from the few projects I've done so people don't make the same really stupid mistakes that I made.
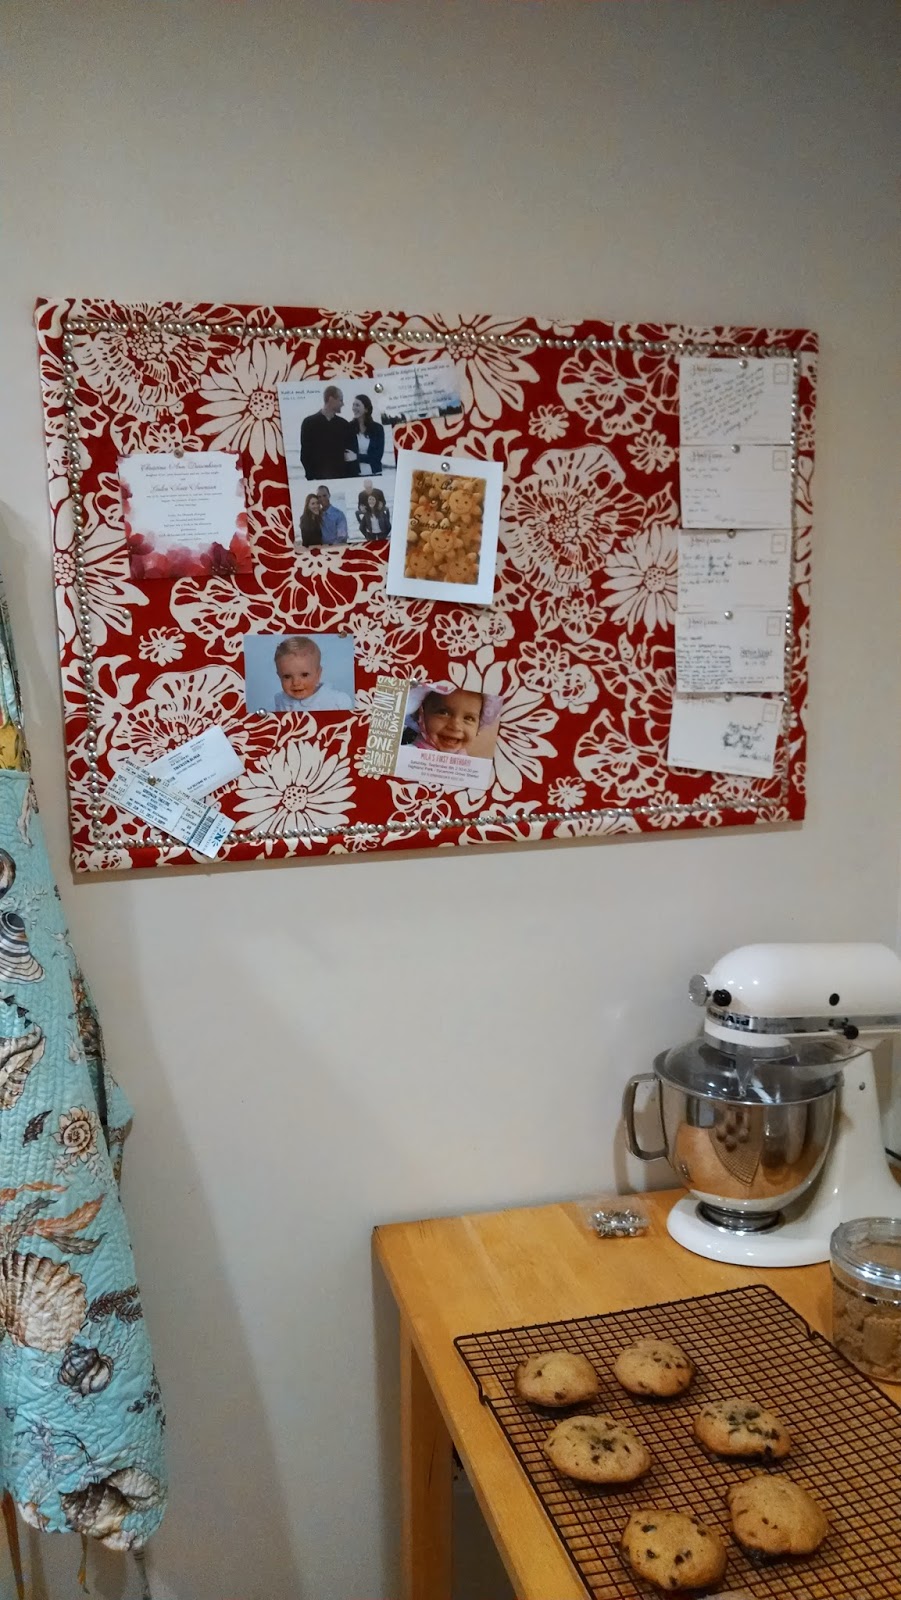
Fabric-covered bulletin board
B+ for easiness. Directions from Chelsea are fantastic and straightforward. It doesn't get an A simply because it takes awhile to get all the thumbtacks in, and your dominant thumb gets really sore. Also, I got my thumbtacks from Staples, fyi, and I needed two boxes of 200 for my 3X2 board, although I had probably 75% of the second box leftover. I also got my fabric on sale, so total cost was <$7.
Calligraphy sayings
A for easiness. So I literally found one I liked on Pinterest (similar quotes here) that wasn't too cheesy, made it big on my screen (or the size I wanted) and copied it. I'm sorry, I'm not even close to artsy enough to write that kind of cursive and then bold it in those certain places. I probably tricked some of my instagram followers though, eh? Anyways, I love how it turned out. The frame is from IKEA. Total cost: $0.

 |
| This also shows the dresser we want to refinish |
Burlap wreath
B- for easiness. Everyone on Pinterest said this was so easy! I had to try maybe seven times before I got it, and that was while watching a video. A lot of places say use wire or hot glue to hold the initial burlap weave in place; I never bothered because I knew I was going to mess up my first few tries, and then by the time I got it, it wasn't unraveling, so I left it as it was. I used extra pieces of fabric I had around, which were irregular lengths and widths, so that made it a little tricky. Even now it isn't perfect, but it's on top of a bookshelf, so I'm not too picky. I think it adds a lot of height to the room., especially with the mirror behind it. I just needed the wire wreath, which I got from JoAnn's. Total cost: >$4.

Polka-dot wall
C for easiness. The idea is super simple: use liquid starch to make fabric stay on a wall. (Lifehacker's site with directions gives a really ugly example.) However, cutting a shape or design you want out of fabric, especially if you want a repeating pattern of that shape and your wall is huge, can take FOREVER. I went super simple and traced a duct tape roll circle onto some thick paper (like an ad on cardstock I got in the mail). Then I cut the fabric in small squares roughly the size of the circle. Then, attaching the cutout circle to the fabric using sewing pins, I cut out the circle. None of them were perfect, so if you wanted something more complex, I hope you have a friend with a laser cutter. Spacing was a nightmare, and while I initially had started marking where each circle went, it would have taken forever to plan it all out, so I eventually eyeballed the majority of it, and it worked pretty well. I made my liquid starch out of water and corn starch (directions on site above), and my first batch was perfect, but my second batch was really bad, so all I can say is make sure you mix it a lot. And all of this is after my original problems determining how much fabric I would need, which I, of course, ended up grossly overestimating (by about 200%). Anyways, three months after starting, I'm nearing completion. Thank goodness it looks fantastic. Total cost: fabric was about $12 (considering I only used half of the $24 I bought).


Mason jar storage
C for easiness. Again, easy idea. Get a board, attach pipe clamps, attach mason jars to pipe clamps. Alas, as I suspected, attaching pipe clamps to the board was not easy. Brian's drill couldn't drill through the metal. We couldn't start the hole by hammering a nail through. So we took it to a friend's house where he used a wood clamp to hold the pipe clamp down and then used a bigger, sharper nail to hammer through it. I would suggest using a thicker piece of wood than the quarter-inch thickness we used; we had to use tiny screws and it means the mason jars are a little wobbly. It doesn't look nearly as great as I wanted it to, but maybe that's because the stuff in mason jars is ugly. Oh well, it's functional.
 |
| So many failed attempts... |


Your polka dot wall looks amazing! So so fun. Sorry it was such a pain!
ReplyDelete